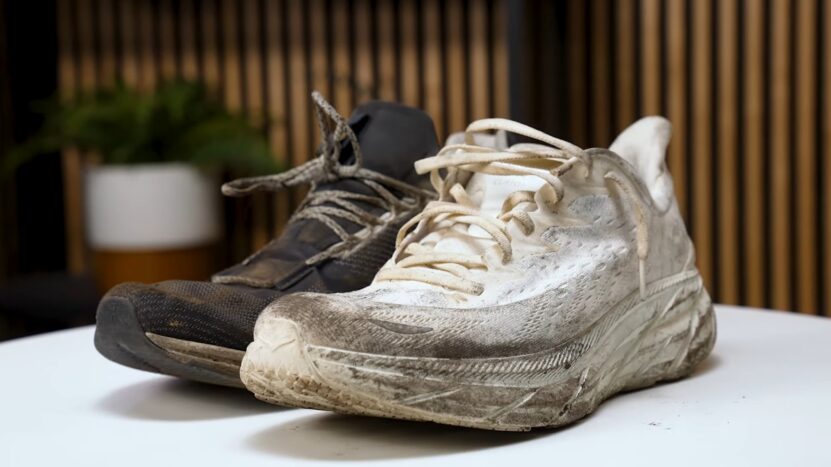
Are you a proud owner of Hoka One One shoes but dread when they start looking dirty? Do you struggle with maintaining their original charm and freshness? This article is for you. We’ll guide you through a detailed process of cleaning your Hoka shoes, ensuring they retain their aesthetic appeal and functionality. By the end of this guide, you’ll have gained the knowledge and confidence to keep your Hokas in top shape.
The Importance of Cleaning

Cleaning your Hoka shoes is more than just about maintaining their appearance; it’s about longevity and performance. Regular cleaning helps preserve the structural integrity of the shoes, preventing dirt and grime from wearing down the materials. It’s a crucial practice, especially if you’re an active runner or use these shoes regularly for your workouts or outdoor activities.
Moreover, cleaned shoes contribute to better foot health. When shoes aren’t cleaned regularly, they can harbor bacteria and fungus, leading to unpleasant odors and, worse, potential foot infections. Cleaning not only keeps your shoes smelling fresh but also promotes healthy feet. Plus, you’ll feel much more confident sporting a pair of clean, spotless Hokas during your workout or daily run.
Lastly, cleanliness also affects your shoes’ performance. Mud, grit, and debris lodged in the outsoles can compromise the traction of the shoes. By regularly cleaning your Hokas, you ensure they provide the optimum grip, which is especially important if you’re into trail running or use your Hokas on uneven terrains.
Gather the Necessary Cleaning Supplies
Before we dive into the cleaning process, it’s important to gather all the necessary cleaning supplies. You’ll need a basin or sink, lukewarm water, a gentle soap or shoe cleaning solution, a soft brush or toothbrush, a sponge or soft cloth, and some paper towels. Each of these tools plays a crucial role in efficiently cleaning your Hoka shoes without damaging them.
You might be tempted to use a harsh detergent or abrasive scrub to remove stubborn dirt, but we highly advise against it. These can break down the materials of your shoes and cause discoloration. Instead, opt for a mild soap or a specially-formulated shoe cleaning solution. The brush you choose should also have soft bristles to prevent scratching the shoes’ surface.
Lastly, make sure you have ample space to work in. Cleaning shoes can get a bit messy, especially when dealing with a lot of mud or dirt. You may also want to keep some old newspapers or a towel handy to protect your working surface from water and soap.
Prepare Your Hoka Shoes for Cleaning

Once you have your cleaning supplies ready, it’s time to prepare your Hoka shoes for cleaning. Start by removing the laces and insoles. This allows you to clean all parts of the shoes thoroughly, including the lace eyelets and inner sides. The laces and insoles can be cleaned separately – simply soak them in soapy water, rinse them, and then leave them to dry.
Shake your shoes to dislodge any loose dirt or pebbles. You can use your brush to gently dust off dry dirt from the surface. It’s easier to clean your shoes when excess dirt is already removed. For stubborn dirt clumps, especially on the outsoles, you may need to use a blunt tool, like a butter knife, to scrape them off.
Lastly, before applying any water or soap, check the manufacturer’s care label for specific cleaning instructions or warnings. This way, you can ensure you’re not using any products or methods that could damage your shoes.
Cleaning the Exterior
Start with cleaning the upper part of your Hokas. Wet a soft cloth or sponge with soapy water and gently scrub the surface of your shoes. The goal here is to remove dirt and stains without damaging the material. Be sure to clean the tongue, as it often collects a lot of dirt and sweat.
Work your way around the shoe, paying attention to crevices and hard-to-reach areas. These are the places where dirt and sweat often accumulate. Don’t forget about the lace eyelets – they can hold more grime than you might think. Use a soft brush or toothbrush to reach these tricky spots.
Rinse the soap off your shoes with clean, lukewarm water. Avoid soaking the shoes completely as this could affect the glue that holds the different parts together. Instead, use a damp cloth or sponge to gently rinse away the soap, ensuring no residue is left behind.
Removing Dirt and Mud from the Outsoles
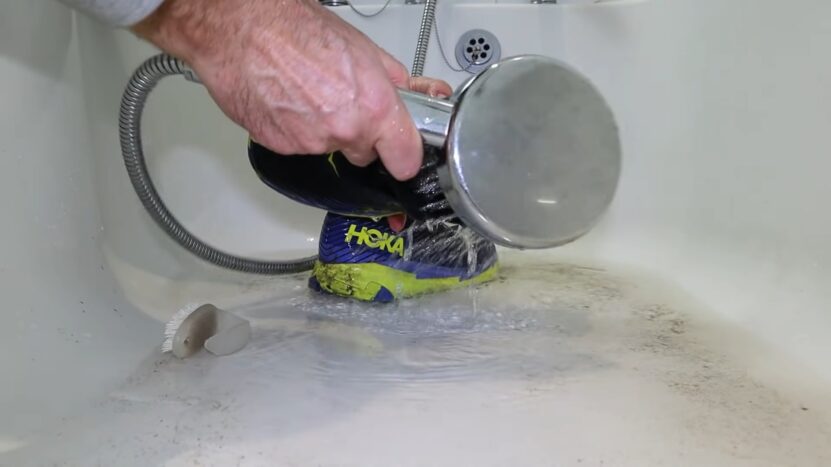
The outsoles of your Hoka shoes, being in constant contact with the ground, are likely to accumulate the most dirt and grime. Cleaning them thoroughly is crucial to maintain the shoes’ grip and performance. Start by knocking the soles together to remove any loose dirt or pebbles.
For stubborn dirt and mud lodged in the tread patterns, use a soft brush or toothbrush to scrub it out. If necessary, use a blunt object like a toothpick or butter knife to remove larger debris, taking care not to damage the rubber. It’s worth spending extra time on this step to ensure your outsoles are completely clean.
Once the dirt has been loosened and removed, wash the outsoles with lukewarm soapy water. Again, avoid soaking the shoes entirely; just concentrate the water on the outsoles. After washing, rinse with clean water and use a cloth or paper towel to pat dry the outsoles.
Cleaning the Midsoles and Cushioning
Cleaning the midsoles and cushioning of your Hokas is a delicate process, given their role in providing comfort and support. Start by wiping them with a damp cloth or sponge to remove superficial dirt. For the grooves and crevices, use a toothbrush dipped in soapy water.
Gently scrub the midsoles and cushioning, taking care not to damage the material. These parts of your shoes are usually made from softer materials that can be easily scratched or damaged. Avoid using hard bristles or abrasive scrubs.
Rinse the soap off with a clean, damp cloth, making sure not to leave any residue behind. This is especially important for cushioning, as soap residue can lead to discomfort and potential skin irritation during use.
Dealing with Stubborn Stains
Now, let’s talk about those stubborn stains that refuse to go away with standard cleaning. Whether it’s a spill, mud stains, or scuff marks, these can be challenging to remove and may require some extra effort.
To tackle stubborn stains, create a paste with baking soda and a small amount of water. Apply this paste to the stain and let it sit for a few minutes. This gives the baking soda time to work its magic and lift the stain. Then, using a soft brush, gently scrub the area until the stain is gone.
For exceptionally tough stains, you might want to consider using a shoe cleaner designed for athletic shoes. These products are specifically formulated to tackle deep stains without damaging the shoe material. As always, make sure to test the product on a small, inconspicuous area first to ensure it doesn’t discolor your Hokas.
Drying Your Hoka Shoes Properly

After your Hokas are clean, it’s important to dry them properly to prevent unpleasant smells and potential damage to the materials. Never put your shoes in a dryer or near direct heat, as this can warp the shape and degrade the materials. Instead, leave your shoes in a well-ventilated area at room temperature to air dry.
To speed up the drying process, you can stuff your shoes with paper towels or newspaper. This absorbs excess moisture and helps the shoes retain their shape as they dry. Remember to change the paper every few hours to ensure it continues to draw out moisture effectively.
Avoid leaving your shoes to dry in direct sunlight. UV rays can cause discoloration and deterioration of the materials over time. A shaded, airy place is the best location for your Hokas to dry.
Maintaining the Freshness
Now that your Hoka shoes are clean and dry let’s ensure they stay fresh for as long as possible. A good practice is to air out your shoes after every wear, especially after intense workouts or long runs. This helps to dissipate sweat and prevents the buildup of bacteria and odors.
Additionally, consider using a shoe deodorizer or baking soda to combat potential smells. Simply sprinkle some baking soda into your shoes and let it sit overnight. It absorbs the odors, and you can easily shake it out the next day.
Try rotating between two or more pairs of shoes. This gives each pair a chance to air out and dry completely between wears, which can significantly help keep them fresh and prolong their life.
Storing Your Cleaned Hoka Shoes
Proper storage of your Hoka shoes is just as important as the cleaning process. The right storage protects your shoes from dust, moisture, and damage, ensuring they’re ready for your next wear. A cool, dry place, away from direct sunlight, is ideal for shoe storage.
Avoid tossing your shoes in a pile or squashing them under heavy items. This can deform the shape and affect their fit and comfort. Instead, store your shoes flat, ideally in a shoe rack or shoe organizer.
Additionally, consider storing your shoes with a silica gel pack or a sock filled with baking soda. This absorbs any residual moisture and keeps your shoes smelling fresh. Just be sure to keep these out of reach from pets and children, as they can be harmful if ingested.
Recommendations for Long-Lasting Cleanliness
To maintain your Hoka shoes’ cleanliness in the long run, try incorporating the following tips into your routine. Firstly, clean your shoes regularly, depending on how often you use them. For regular runners, a thorough clean every two weeks should suffice.
Avoid wearing your Hokas in muddy or overly dirty areas if possible. If you can’t avoid this, try to clean your shoes immediately after. This prevents the dirt from settling and makes the cleaning process much easier.
Consider investing in a shoe protector spray. These sprays create a barrier on your shoes’ surface that repels water and dirt, keeping your Hokas cleaner for longer.
Closing Thoughts
Cleaning your Hoka shoes doesn’t have to be a daunting task. With the right tools and a bit of time, you can restore your Hokas to their original glory, prolong their lifespan, and ensure they continue to provide the comfort and support you’ve come to love.
Remember, regular cleaning and proper care are integral to preserving the quality and performance of your Hoka shoes. Keep your Hokas clean, dry, and fresh, and they’ll take care of your feet in return.